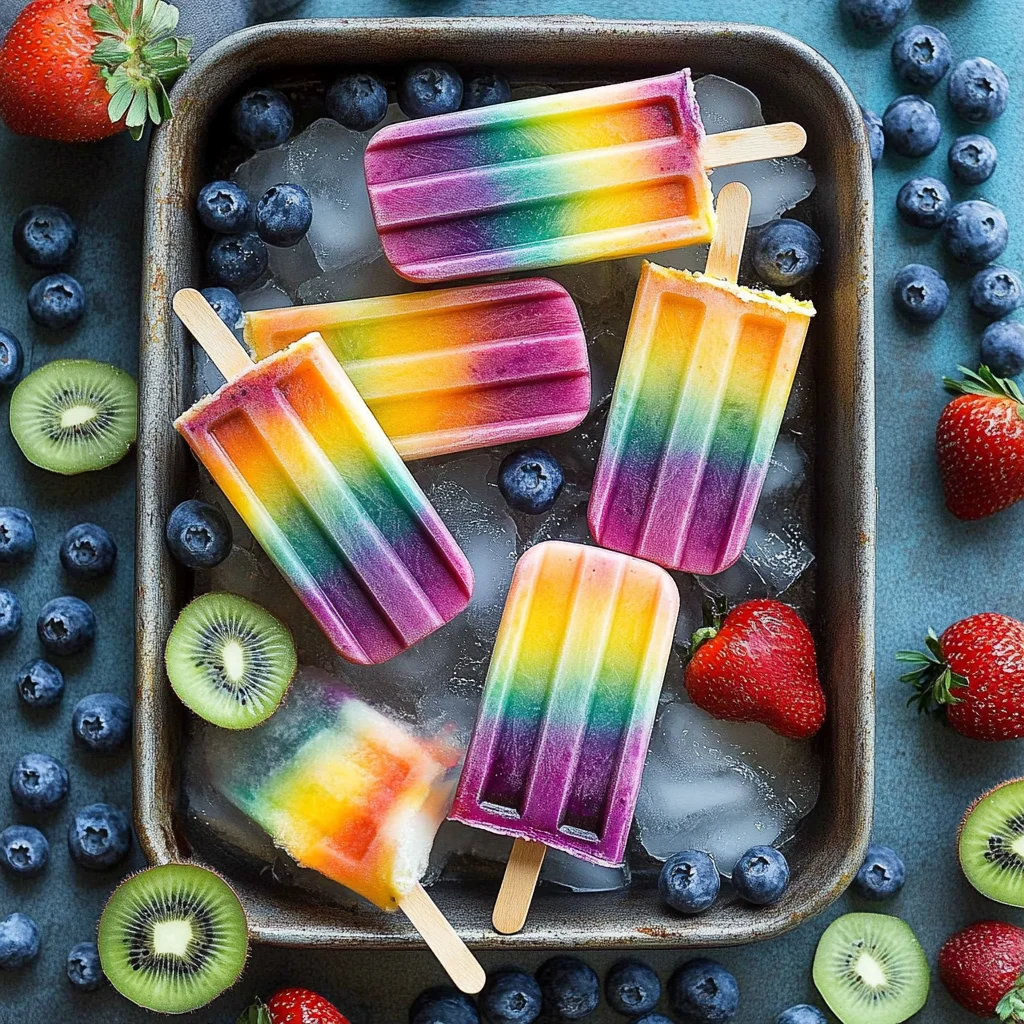
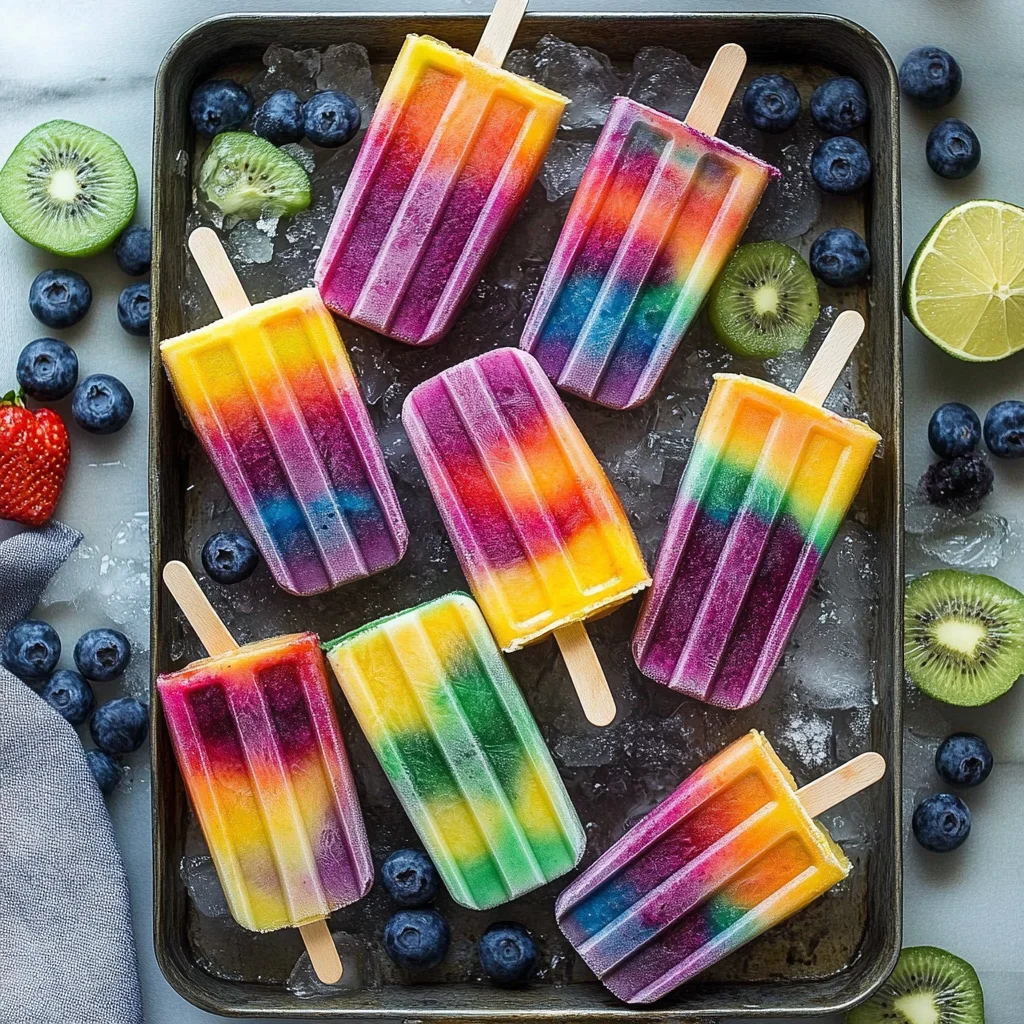
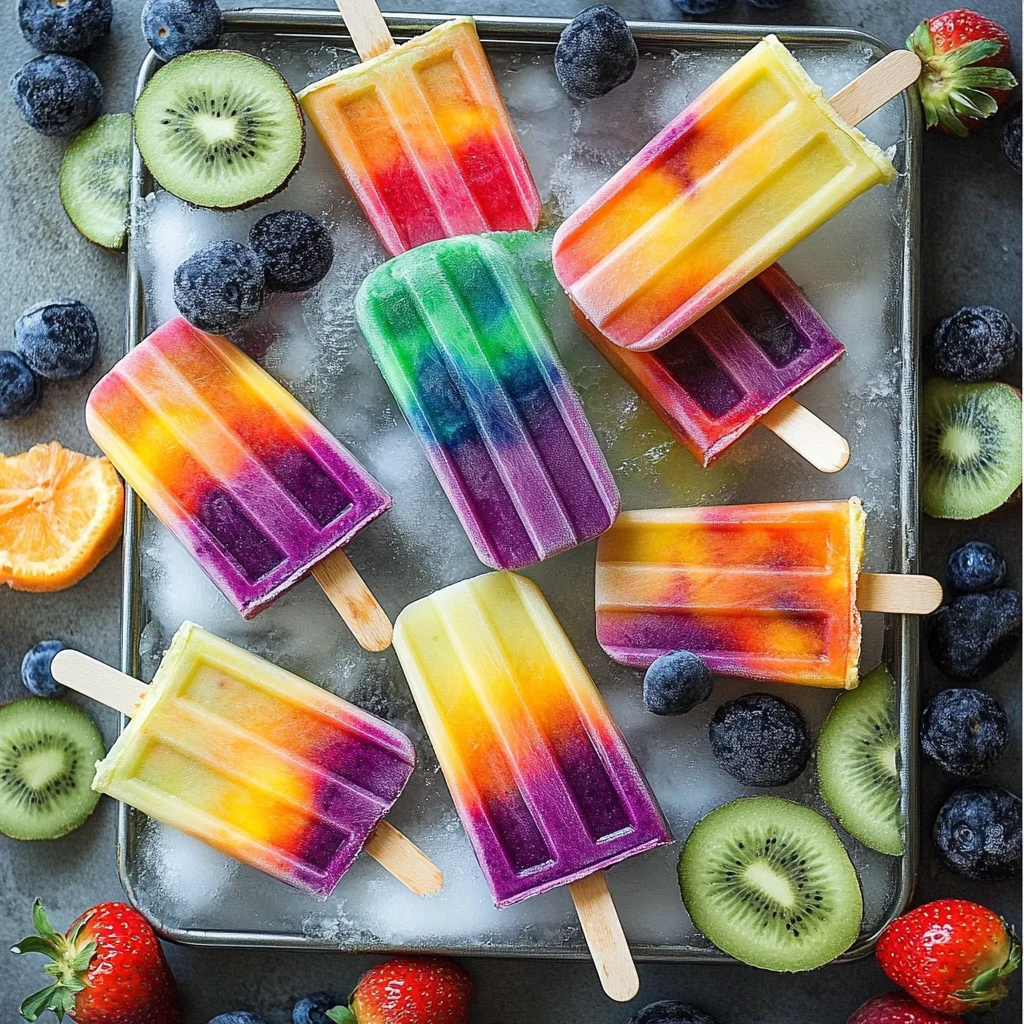
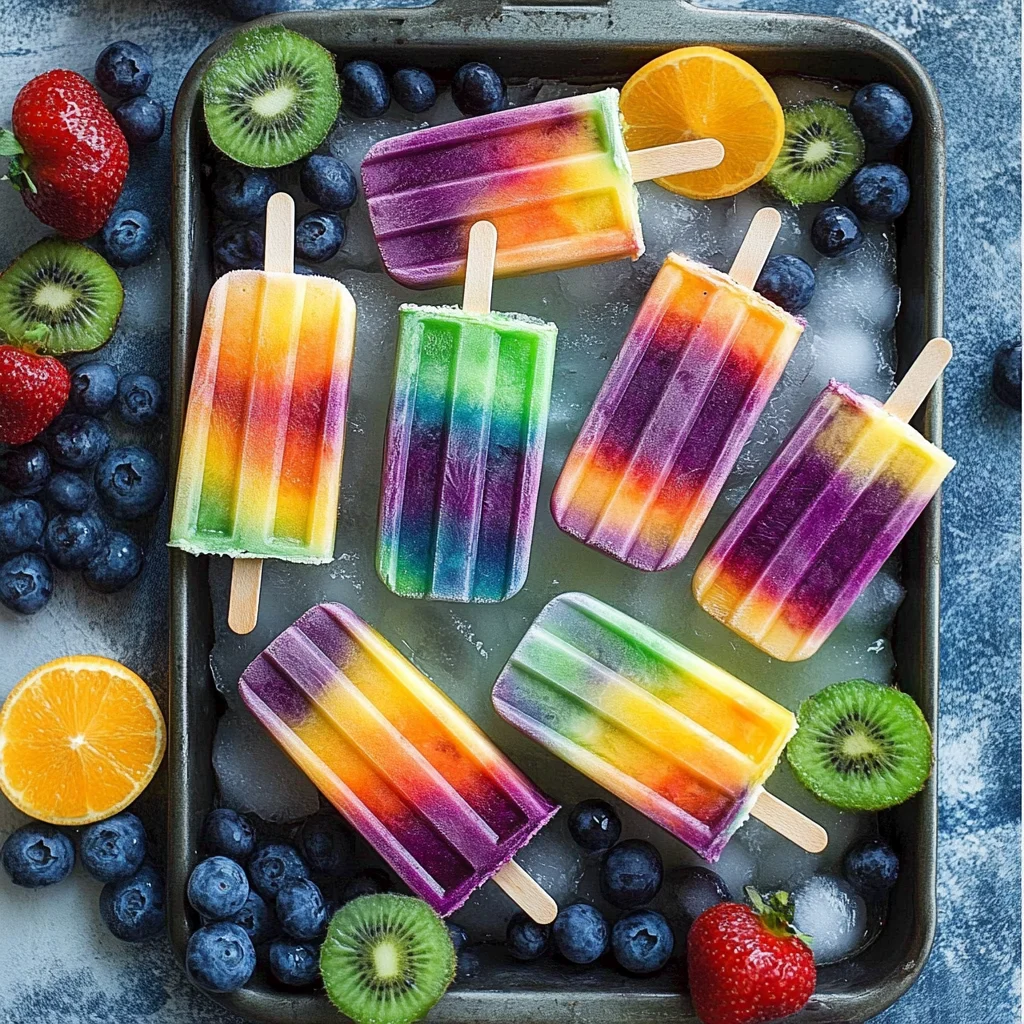
Outstanding 7 layer rainbow popsicles! Make your own homemade rainbow popsicles with lots of fresh fruit. These Rainbow Popsicles are not only vibrant and fun but also a healthy treat that everyone will enjoy. Perfect for warm days, birthday parties, or just as a special dessert, these popsicles are sure to delight kids and adults alike.
Why You’ll Love This Recipe
- Colorful Presentation: These rainbow popsicles are visually stunning, making them an eye-catching addition to any gathering.
- Nutritious Ingredients: Packed with fruits and Greek yogurt, these popsicles offer a refreshing and healthy option for summer treats.
- Customizable Flavors: You can easily swap out fruits based on your preferences or what’s in season, allowing for endless variations.
- Easy to Make: With simple blending and layering techniques, you can whip up these delicious treats without any fuss.
- Fun for Kids: Involve children in the preparation process—layering the colors is a fun activity that they’ll love!
Tools and Preparation
To create your colorful rainbow popsicles, gather a few essential tools that will make the process easier and more efficient.
Essential Tools and Equipment
- Blender
- Popsicle molds
- Measuring cups
- Knife (for fruit preparation)
- Mixing bowl
Importance of Each Tool
- Blender: A good blender is essential for achieving smooth textures when blending fruits and yogurt for your popsicles.
- Popsicle molds: These molds shape your treats perfectly, ensuring they have the right form and size.
- Measuring cups: Accurate measurements help maintain consistency in flavor across different batches of rainbow popsicles.
Ingredients
Outstanding 7 layer rainbow popsicles! Make your own homemade rainbow popsicles with lots of fresh fruit!
Layer 1: Raspberry & Banana
- 1 frozen banana
- 1/2 cup (113g) Greek yogurt (vanilla or plain)
- 1/2 cup frozen raspberries
- water or liquid for blending
Layer 2: Strawberry & Peach
- 1 frozen banana
- 1/2 cup (113g) Greek yogurt (vanilla or plain)
- 1/2 cup frozen peaches
- 1 small orange
- 1/4 cup frozen mango
- water or liquid for blending
Layer 3: Pineapple & Spinach
- 2 frozen bananas
- 1/2 cup (113g) Greek yogurt (vanilla or plain)
- 1 cup frozen pineapple
- water or liquid for blending
Layer 4: Blue Pineapple
- 2 frozen bananas
- 1/2 cup (113g) Greek yogurt (vanilla or plain)
- 1 handful (or more spinach)
- 1 cup frozen pineapple
- water or liquid for blending
Layer 5: Blueberry Blend
- 2 frozen bananas
- 1/2 cup (113g) Greek yogurt (vanilla or plain)
- 1 cup frozen pineapple
- small amount of blue food coloring
- water or liquid for blending
Layer 6: Mixed Berry
- 1 frozen banana
- 1/2 cup (113g) Greek yogurt (vanilla or plain)
- 1 cup frozen mixed berries
- water or liquid for blending
Layer 7: Beet & Strawberry
- 1 frozen banana
- 1/2 cup (113g) Greek yogurt (vanilla or plain)
- 1/2 cup sliced canned beets
- 1 cup frozen strawberries or raspberries
For Garnish
- 2 tablespoons fresh parsley, finely chopped
How to Make Rainbow Popsicles
Step 1: Prepare Your Ingredients
Start by gathering all your ingredients. Ensure that the fruits are properly measured and ready to blend.
Step 2: Blend Each Layer Separately
Blend each layer one at a time:
1. For the first layer, combine the ingredients listed under Layer 1 in a blender. Add enough water until you reach a smooth consistency.
2. Pour this mixture into the bottom of your popsicle mold. Repeat this step for all layers, allowing each layer to freeze slightly before adding the next.
Step 3: Freeze the Popsicles
After filling your molds with all seven layers, place them in the freezer. Let them freeze completely—this will take about 8 hours or overnight.
Step 4: Unmold and Serve
Once fully set, run warm water over the outside of the molds to loosen them. Carefully remove each rainbow popsicle and serve immediately. Enjoy your colorful treat!
How to Serve Rainbow Popsicles
Rainbow popsicles are not only a treat for the taste buds but also a feast for the eyes. Serving them creatively can enhance the fun and enjoyment, making them perfect for parties or a hot summer day.
Fun Party Presentation
- Arrange colorful rainbow popsicles on a large platter for a vibrant display.
- Add decorative toothpicks with fun flags for each popsicle to make them more festive.
Fruit Skewers
- Pair rainbow popsicles with fruit skewers for added freshness.
- Use colorful fruits like strawberries, kiwi, and blueberries on skewers alongside the popsicles.
Ice Cream Cone Base
- Serve rainbow popsicles in ice cream cones for a playful twist.
- Dip the cones in melted chocolate and sprinkles before adding the popsicle for extra flair.
Refreshing Beverages
- Offer refreshing drinks like lemonade or fruit punch as complements.
- These beverages pair well with fruity flavors of the rainbow popsicles.
Picnic Style
- Pack rainbow popsicles in cooler bags for a fun picnic treat.
- Include napkins and reusable utensils to keep it eco-friendly.
Dessert Bar
- Create a dessert bar with toppings like granola, coconut flakes, or chocolate chips.
- Encourage guests to customize their rainbow popsicle experience.
How to Perfect Rainbow Popsicles
Making perfect rainbow popsicles is all about balancing flavors and creating vibrant layers. Here are some tips to help you achieve that perfect pop.
- Use fresh ingredients: Fresh fruits will provide better flavor and texture compared to frozen alternatives.
- Blend well: Ensure each layer is smoothly blended so that colors mix seamlessly without chunks.
- Layer carefully: Pour each layer slowly into molds to prevent mixing and maintain distinct colors.
- Freeze between layers: Freeze each layer slightly before adding the next to create clear separations.
- Experiment with flavors: Try different combinations of fruits and yogurt flavors to find your favorite mix.
- Make ahead: Prepare rainbow popsicles in advance; they last well in the freezer for up to two weeks.
Best Side Dishes for Rainbow Popsicles
Rainbow popsicles can be paired with various side dishes that complement their fruity flavors. Here are some delightful options:
- Fruit Salad
A refreshing mix of seasonal fruits that enhances the fruity theme of your dessert. - Yogurt Parfaits
Layers of yogurt, granola, and mixed berries create a deliciously creamy counterpart. - Cheese Plate
A selection of cheeses paired with crackers provides a savory balance to sweet treats. - Veggie Sticks
Crunchy carrot, cucumber, and bell pepper sticks served with hummus add a healthy crunch. - Mini Sandwiches
Small sandwiches filled with cheese or spreads can satisfy savory cravings while keeping things light. - Pasta Salad
A cold pasta salad with veggies gives a filling option while remaining refreshing alongside popsicles. - Granola Bars
Homemade or store-bought granola bars offer an easy snack that feels wholesome and delicious. - Smoothie Bowls
A vibrant smoothie bowl topped with seeds and nuts complements your colorful dessert beautifully.
Common Mistakes to Avoid
Making Rainbow Popsicles can be fun, but there are common mistakes that can affect the outcome. Here are some pitfalls to watch for.
- Overfilling molds: It’s tempting to fill the molds to the brim, but leaving some space allows for expansion as they freeze. This prevents overflow and ensures easier removal.
- Skipping layering: Each layer adds color and flavor. If you skip this step, your popsicles will lack the beautiful rainbow effect. Take your time to pour each layer slowly.
- Using too much liquid: Adding excessive liquid can make your popsicles too icy rather than creamy. Stick to the recommended amounts for a smooth texture.
- Not blending well: For a uniform texture, ensure each fruit blend is smooth before pouring it into the molds. Lumps can disrupt the beautiful layers.
- Ignoring freezing times: Patience is key! If you don’t freeze each layer long enough before adding the next one, they may not hold together well.
Storage & Reheating Instructions
Refrigerator Storage
- Store any leftover popsicles in an airtight container for up to 3 days.
- Keep them away from strong-smelling foods to avoid flavor transfer.
Freezing Rainbow Popsicles
- Freeze the popsicles for at least 6-8 hours for best results.
- Use silicone molds or plastic popsicle molds for easy removal.
Reheating Rainbow Popsicles
- Oven: Not recommended since this will melt your popsicles quickly.
- Microwave: Use a low power setting for just a few seconds if you need to soften them slightly before eating.
- Stovetop: Avoid reheating as it will alter the texture and flavor of your popsicles.
Frequently Asked Questions
Here are some common questions about making Rainbow Popsicles.
Can I customize my Rainbow Popsicles?
Absolutely! You can mix different fruits or add sweeteners like honey based on your taste preferences.
How do I make Rainbow Popsicles dairy-free?
Simply replace Greek yogurt with a dairy-free yogurt alternative. Coconut yogurt works well for a tropical flavor!
What fruits work best in Rainbow Popsicles?
Fruits like berries, bananas, peaches, and mangoes create vibrant colors and delicious flavors. Feel free to experiment with what you have on hand!
How do I prevent my Rainbow Popsicles from sticking?
To remove popsicles easily from molds, run warm water over the outside of the mold for a few seconds before pulling them out.
Final Thoughts
Rainbow Popsicles are not only visually stunning but also offer a refreshing treat packed with nutrients. Their versatility allows you to mix and match flavors, making them perfect for customizing according to your preferences. Give this recipe a try and enjoy creating colorful layers that will delight everyone!

Rainbow Popsicles
Brighten up your sunny days with these delightful homemade rainbow popsicles! Bursting with vibrant colors and made from fresh fruits, these seven-layer treats are not only visually impressive but also a healthy option that satisfies your sweet tooth. Perfect for summer gatherings, birthday parties, or just a special dessert at home, everyone—kids and adults alike—will enjoy their refreshing flavors. With the ability to customize each layer based on seasonal fruits, you can easily create a unique treat that fits any occasion.
- Total Time: 48 minute
- Yield: Approximately 7 servings 1x
Ingredients
- 4 frozen bananas
- 2 cups Greek yogurt (vanilla or plain)
- 1/2 cup frozen raspberries
- 1/2 cup frozen peaches
- 1 cup frozen pineapple
- 1 cup frozen mixed berries
- 1/2 cup sliced canned beets
- Water for blending
Instructions
- Prepare your ingredients by measuring out the fruits and yogurt.
- For Layer 1: Blend together 1 banana, Greek yogurt, raspberries, and water until smooth. Pour into popsicle molds.
- Repeat blending for Layers 2 to 7 using the corresponding ingredients listed in the original recipe. Freeze each layer for about 30 minutes before adding the next one.
- Once all layers are filled, freeze the popsicles completely for at least 6-8 hours.
- To serve, run warm water over the outside of the molds to loosen them and enjoy!
- Prep Time: 30 minutes
- Cook Time: None
- Category: Dessert
- Method: Freezing
- Cuisine: American
Nutrition
- Serving Size: 1 popsicle
- Calories: 60
- Sugar: 10g
- Sodium: 20mg
- Fat: 0.5g
- Saturated Fat: 0.2g
- Unsaturated Fat: 0.3g
- Trans Fat: 0g
- Carbohydrates: 14g
- Fiber: 2g
- Protein: 3g
- Cholesterol: 5mg
Keywords: For a dairy-free option, substitute Greek yogurt with coconut yogurt. Feel free to mix fruits based on your preferences or what’s available seasonally. To enhance flavor, consider adding natural sweeteners like honey or agave syrup.