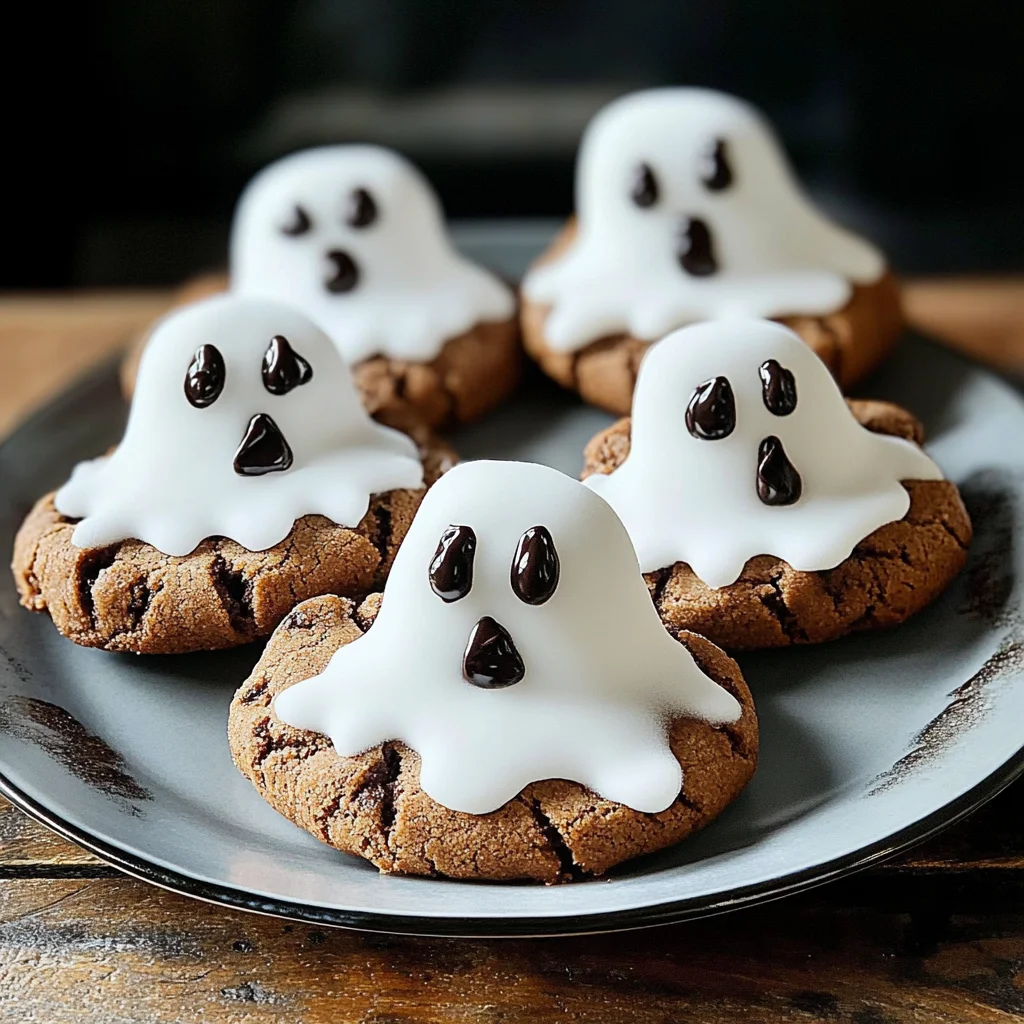
These Ghost cookies are the perfect spooky treats for Halloween gatherings or any festive occasion! With their playful design and simple preparation, they bring a fun twist to traditional cookie recipes. Easy to make and delightful to eat, these ghostly sweets are sure to impress both kids and adults alike. Get ready to elevate your baking game with this creative recipe that pairs perfectly with chilly autumn nights!
Why You’ll Love This Recipe
- Quick and Easy: With just one pack of cookies and minimal ingredients, these ghost cookies come together in no time.
- Fun for All Ages: Decorating these spooky treats is a great activity for kids and adults, making it a fantastic family project.
- Customizable Design: Use your creativity to create different ghost expressions with black writing icing.
- Perfect for Parties: These cookies are an eye-catching addition to any Halloween party or gathering.
- Deliciously Satisfying: The combination of chocolate chunk cookies and sweet marshmallows makes every bite a treat.
Tools and Preparation
Before you start making your Ghost cookies, gather the essential tools you’ll need. Having everything prepared will help streamline the baking process, ensuring a smoother experience.
Essential Tools and Equipment
- Baking sheet
- Parchment paper
- Mixing bowl
- Spatula
Importance of Each Tool
- Baking sheet: This ensures even cooking of your cookies while providing ample space for decorating.
- Parchment paper: Prevents sticking and makes cleanup easy—no more scrubbing stuck-on cookie residue!
- Mixing bowl: A sturdy bowl is essential for mixing icing and ensuring all ingredients blend well.
- Spatula: Perfect for spreading icing evenly on each cookie, giving them that ghostly appearance.

Ingredients
To create these delightful Ghost cookies, gather the following ingredients:
For the Ghost Cookies
- 175g icing sugar
- 1 x 200g pack chocolate chunk cookies
- 9 vegan marshmallows (regular size)
- black writing icing
How to Make Ghost Cookies
Step 1: Prepare Your Workspace
Start by preheating your oven if necessary and lining your baking sheet with parchment paper. This creates a clean area for your cookie assembly.
Step 2: Decorate the Cookies
- Take each chocolate chunk cookie, placing them on the parchment-lined baking sheet.
- Using your icing sugar, mix with a small amount of water until you achieve a spreadable consistency.
- Spread the icing generously on top of each cookie, allowing it to drizzle down slightly—this gives a ghostly effect.
Step 3: Add the Marshmallow Ghosts
- Place one vegan marshmallow on top of each iced cookie as the body of the ghost.
- Use the black writing icing to draw eyes and mouths on each marshmallow, creating fun expressions.
Step 4: Let Them Set
Allow the decorated cookies to sit at room temperature until the icing hardens slightly. This will ensure that your decorations stay intact when serving.
Now you have delicious and spooky Ghost cookies ready to delight everyone at your Halloween festivities! Enjoy!
How to Serve Ghost cookies
Ghost cookies are a fun and festive treat perfect for Halloween gatherings or a spooky movie night. Here are some creative ways to serve them that will delight both kids and adults alike.
On a Spooky Platter
- Arrange your ghost cookies on a decorative platter surrounded by candy corn and gummy worms for a colorful Halloween display.
With Hot Chocolate
- Serve these cookies alongside a warm cup of hot chocolate, creating a cozy pairing that’s perfect for chilly evenings.
At a Halloween Party
- Set up a cookie station at your Halloween party where guests can decorate their own ghost cookies with extra icing and sprinkles.
As Party Favors
- Package individual ghost cookies in clear bags tied with orange ribbons. These make great take-home treats for guests.
How to Perfect Ghost cookies
To make your ghost cookies truly stand out, follow these simple tips. They will help you achieve the best texture and flavor.
- Use fresh ingredients: Always check the expiration dates on your baking supplies. Fresh ingredients yield the best results.
- Make even-sized cookies: Use a cookie scoop to ensure each cookie is the same size. This helps them bake evenly.
- Let them cool completely: Before decorating, ensure your cookies have cooled completely. This prevents the icing from melting.
- Store properly: Keep any leftover cookies in an airtight container to maintain their freshness for days.
Best Side Dishes for Ghost cookies
Pairing ghost cookies with delightful side dishes can elevate your Halloween festivities. Here are some tasty options to consider.
- Pumpkin Soup: A warm and creamy pumpkin soup that complements the sweetness of ghost cookies beautifully.
- Apple Slices with Caramel Dip: Crisp apple slices served with a rich caramel dip provide a refreshing contrast.
- Cheese Plate: Offer an assortment of cheeses, crackers, and fruits for a savory balance alongside sweet treats.
- Veggie Tray: Fresh vegetables paired with hummus or ranch dressing create a healthy option that guests will enjoy.
- Spiced Hot Cider: A warm drink infused with spices warms up any gathering and pairs well with sweet treats.
- Chocolate-Dipped Pretzels: Salty pretzels dipped in chocolate add an exciting flavor twist to your dessert table.
- Fruit Skewers: Colorful fruit skewers add freshness and vibrant colors that contrast nicely with ghost cookies.
- Popcorn Balls: Sweet popcorn balls bring crunch and sweetness, making them an appealing addition to any Halloween spread.
Common Mistakes to Avoid
- Avoid overmixing the dough. This can lead to tough cookies. Mix just until combined for a tender texture.
- Don’t skip the chilling step. Chilling the dough helps prevent spreading and gives better shape. Be patient; it’s worth it!
- Watch out for using stale ingredients. Fresh baking soda and flour make a difference in flavor and texture. Always check your pantry before starting.
- Avoid improper storage. Storing cookies in an airtight container keeps them fresh longer. Don’t leave them exposed to air.
- Don’t forget about decorating techniques. Using black writing icing can elevate your ghost cookies. Practice simple designs before decorating.
Storage & Reheating Instructions
Refrigerator Storage
- Store ghost cookies in an airtight container for up to 5 days.
- Layer cookies with parchment paper to avoid sticking.
Freezing Ghost cookies
- Freeze ghost cookies in a freezer-safe bag or container for up to 3 months.
- Label with the date for easy tracking.
Reheating Ghost cookies
- Oven: Preheat to 350°F (175°C) and warm cookies for about 5 minutes.
- Microwave: Heat one cookie at a time for about 10-15 seconds on low power.
- Stovetop: Use a skillet over low heat, covering with a lid, for around 1-2 minutes.
Frequently Asked Questions
Here are some common questions about ghost cookies that many bakers have.
What are Ghost cookies?
Ghost cookies are fun Halloween treats made from chocolate chunk cookies decorated to look like spooky ghosts, perfect for parties!
How long does it take to make Ghost cookies?
Making ghost cookies takes about 25 minutes from start to finish, including preparation and decorating time.
Can I customize my Ghost cookies?
Absolutely! You can use different cookie types or add colorful sprinkles or edible eyes for unique designs.
Are Ghost cookies suitable for kids?
Yes, these treats are easy and safe for kids to help decorate, making them a fun family activity during Halloween!
How should I store leftover Ghost cookies?
Store leftover ghost cookies in an airtight container at room temperature or refrigerate them for up to five days.
Final Thoughts
These ghost cookies are not only adorable but also incredibly easy to make, making them ideal for Halloween gatherings. You can customize them with various decorations and flavors, so feel free to get creative! Try making these delightful treats this season; they’re sure to impress friends and family alike!

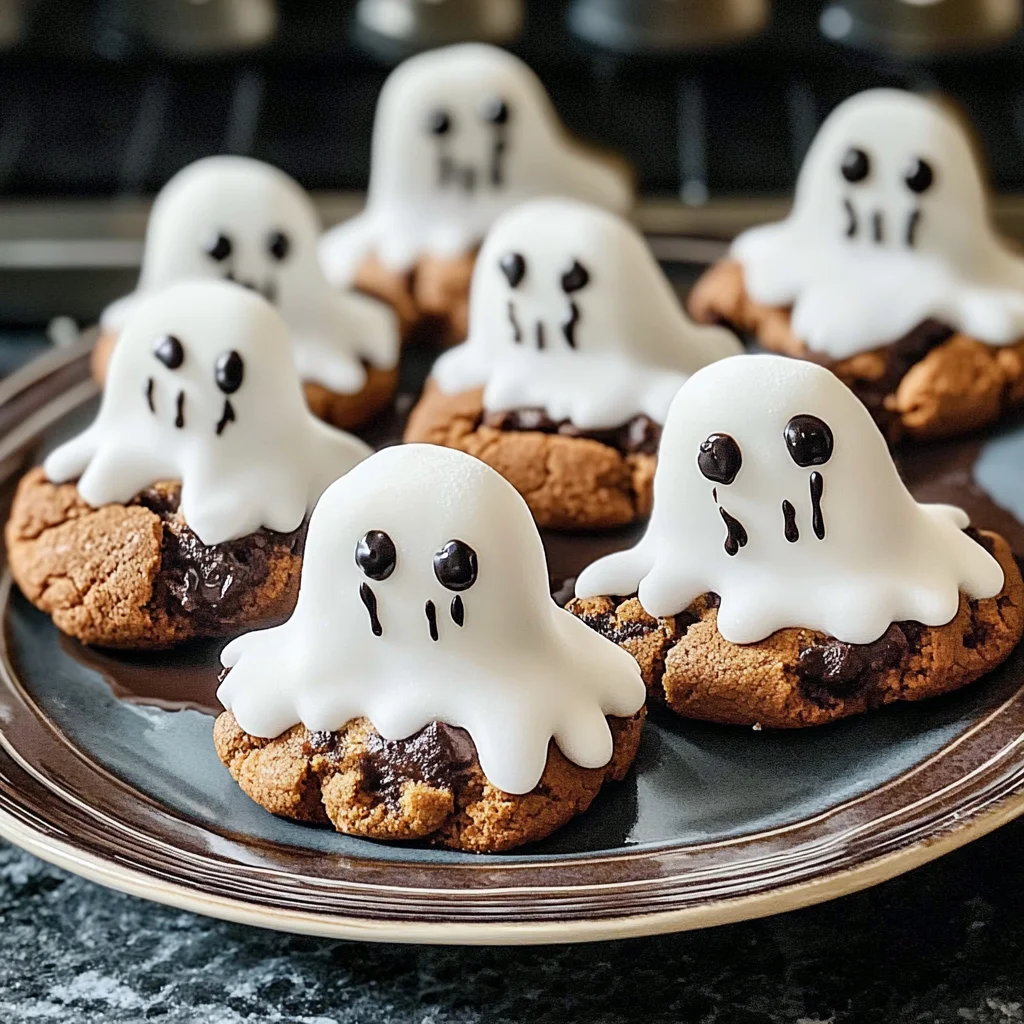
Ghost Cookies
Get ready to impress your guests with these delightful Ghost cookies! Perfect for Halloween parties or festive gatherings, these fun treats are easy to make and a joy to decorate. Using chocolate chunk cookies as the base, each cookie is topped with sweet vegan marshmallows and decorated with black writing icing to create playful ghostly faces. Whether you’re hosting a spooky movie night or simply want to get creative in the kitchen, these Ghost cookies are sure to be a hit with kids and adults alike. Let’s dive into this sweet baking adventure!
- Total Time: 25 minutes
- Yield: Serves approximately 9 cookies 1x
Ingredients
- 175g icing sugar
- 200g pack chocolate chunk cookies
- 9 vegan marshmallows (regular size)
- Black writing icing
Instructions
- Preheat your oven if necessary and line your baking sheet with parchment paper.
- Place each chocolate chunk cookie on the prepared baking sheet.
- Mix the icing sugar with a small amount of water until spreadable, then generously coat the top of each cookie.
- Place one vegan marshmallow on top of each iced cookie and use black writing icing to create eyes and mouths for your ghosts.
- Allow the decorated cookies to set at room temperature until the icing hardens.
- Prep Time: 15 minutes
- Cook Time: 10 minutes
- Category: Dessert
- Method: Baking
- Cuisine: American
Nutrition
- Serving Size: 1 cookie (approx. 40g)
- Calories: 150
- Sugar: 20g
- Sodium: 50mg
- Fat: 5g
- Saturated Fat: 2g
- Unsaturated Fat: 3g
- Trans Fat: 0g
- Carbohydrates: 25g
- Fiber: <1g
- Protein: <1g
- Cholesterol: 0mg
Keywords: Feel free to personalize your ghost designs by using different expressions or adding colorful sprinkles! Store any leftover cookies in an airtight container for up to five days.